This is going to be the first in a series of posts on using the XRGB-mini Framemeister with a wide variety of computers and consoles from my collection. I’ll discuss optimal settings and configurations, as well as any potential pitfalls. Wherever possible, I’ll be using the legendarily versatile classic Commodore 1084S-P (CRT) as the “control” or gold standard for comparison purposes against the XRGB-mini Framemeister hooked up to a Sony PlayStation 3D display (LCD/LED; note that I did try other LCD displays and was not satisfied with the quality–the XRGB is only as good as the modern display it’s going to!). First up is the Coleco Adam.
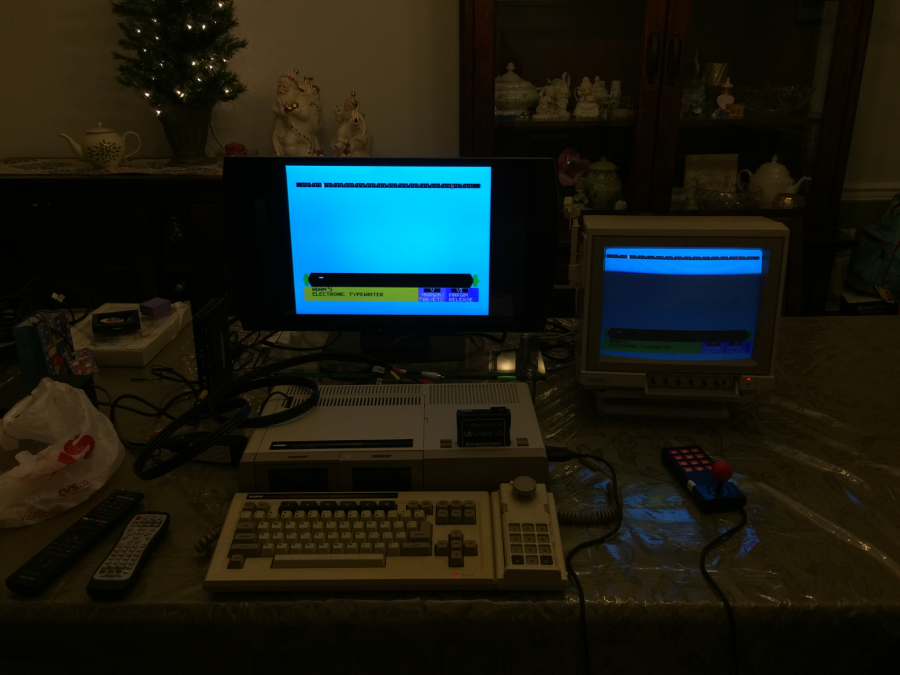
There are actually two ways to get composite output from the Coleco Adam. One is the Adam’s MONITOR port, which does composite video using a single composite cable, and the other is the Adam’s AUX VIDEO port (DIN), which is using a fairly standard monitor cable to output composite video and mono audio. The nice thing about these options is that both can be used at the same time, which is how I was able to get the side-by-side photos. In the future, I’ll be doing direct video captures, but for these initial tests I’ll just be doing quick iPhone photos. While this is not an ideal way of showing output on a CRT thanks to the way that technology displays images (accounting for darkness and/or lines in photos that are not present when viewing it live), it should still give a general sense of the comparative quality.

Coleco Adam SmartWriter. XRGB-mini Framemeister on a Sony PlayStation 3D display on the left, and a Commodore 1084S-P on the right.
The monitor cable I’m using with the Adam is a fairly low quality five pin model, with composite video and audio. The latter is “stereo” in that the mono audio signal is split/mirrored on both connectors. I plugged that into the front of the XRGB-mini. The output from the XRGB-mini was sent via HDMI to the PlayStation 3D display on its first input.

Coleco Adam BurgerTime. XRGB-mini Framemeister on a Sony PlayStation 3D display on the left, and a Commodore 1084S-P on the right.
In this case, after trying nearly every possible configuration option, I found the most pleasing settings on the XRGB-mini to be NATURAL for the Processing Mode with STANDARD aspect ratio. BRIGHTNESS was set to 19, which allowed the black levels to match that of the PlayStation 3D display. The PlayStation 3D display was set to STANDARD mode with all default settings. Both the XRGB-mini and PlayStation 3D display were set to output and receive 1920x1080p/60 resolution/frame rate, respectively.

Coleco Adam EOS menu. XRGB-mini Framemeister on a Sony PlayStation 3D display on the left, and a Commodore 1084S-P on the right.
A single composite video cable went from the Adam’s MONITOR port to the rear of the 1084S-P. In theory, the XRGB-mini is taking the raw video output and only doing minimal color processing, so I used the PlayStation 3D display to help calibrate the colors on the 1084S-P, which is more susceptible to the vagaries of the classic NTSC standard.

Coleco Adam SmartBASIC. XRGB-mini Framemeister on a Sony PlayStation 3D display on the left, and a Commodore 1084S-P on the right.
As you can tell from the photos, with those settings, the XRGB-mini is a close match to the 1084S-P. While the color saturation (though not necessarily the actual colors) and black levels were naturally better on the 1084S-P, unless you’re doing a direct comparison, the XRGB-mini paired with the PlayStation 3D display proves a worthy modern day alternative.


 Your total news and information resource for all things Science, Technology, Engineering / Mathematics, Art, and Medicine / Health.
2 Comments
Leave your reply.