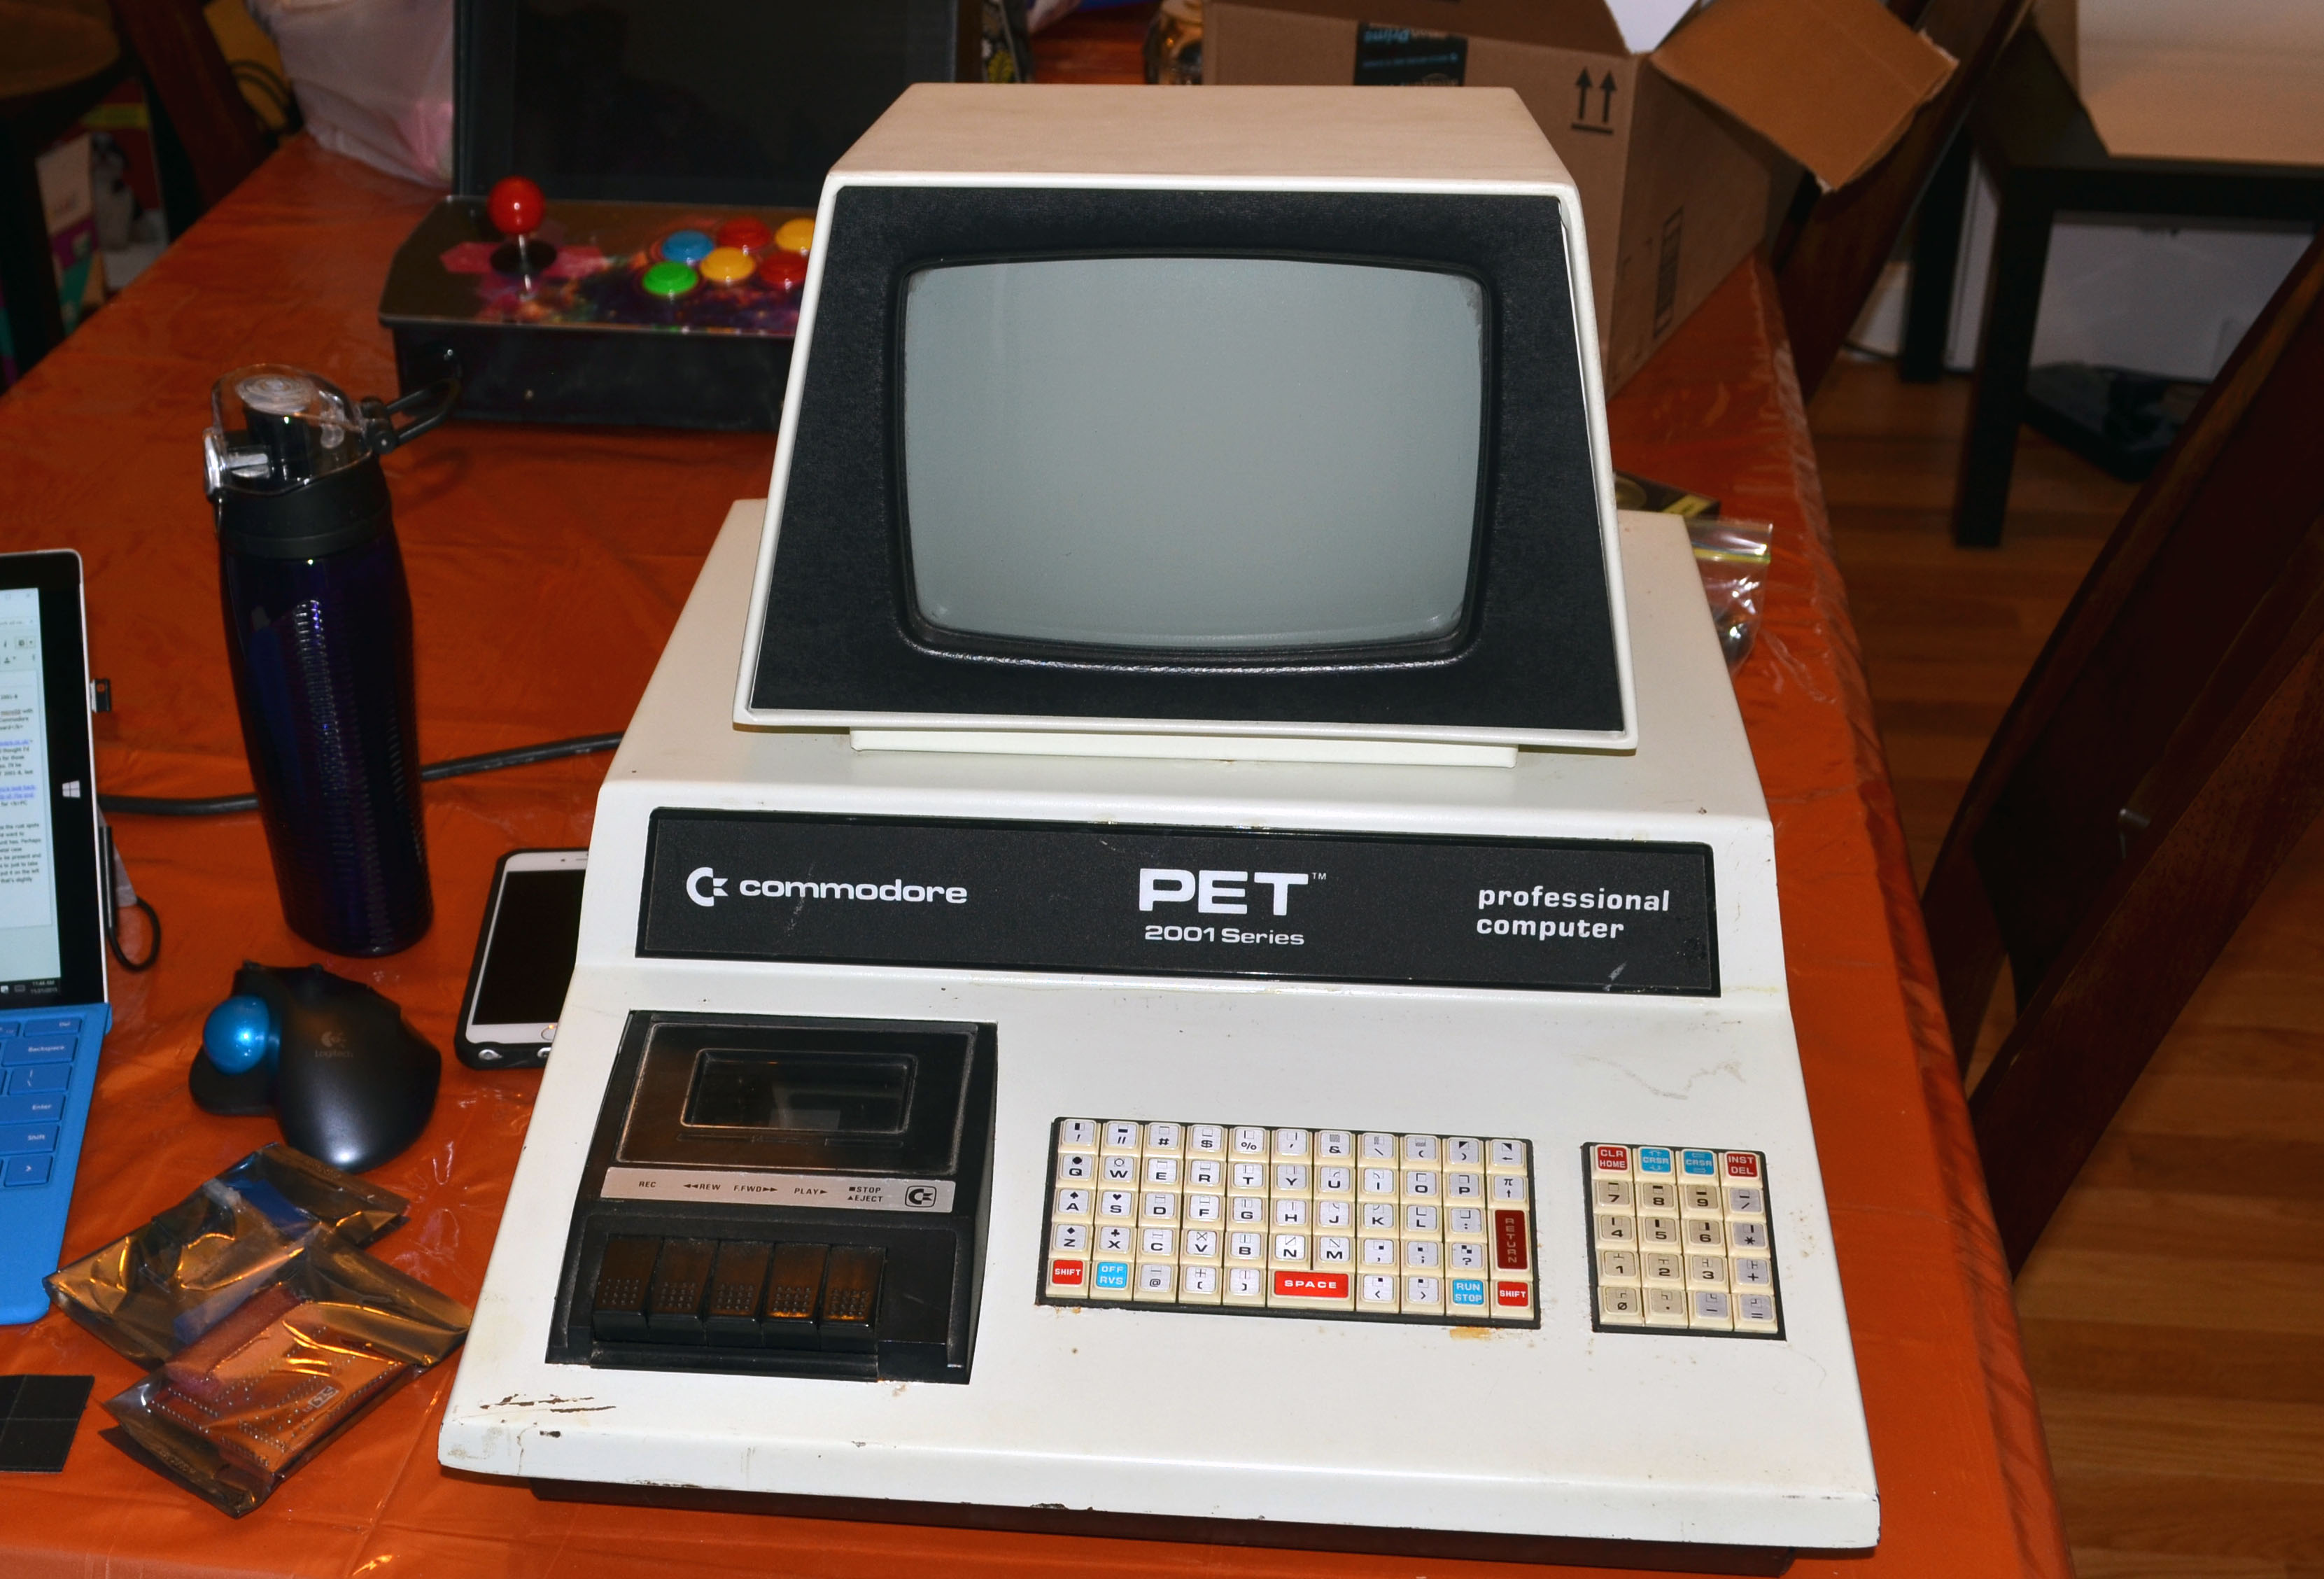
I recently received the PET microSD with datasette power and Commodore PET 2001 ROM/RAM upgrade board from Tynemouth Software, so I thought I’d document the upgrade process for those interested in doing it themselves. I’ll be upgrading my Commodore PET 2001-8, last seen in a new article I wrote for PC Gamer. Although my main PET is a SuperPET, I’d love to get this more interesting vintage specimen up to snuff as well.
While I’m not going to address the rust spots or other case issues, I did first want to address a slight wobble my unit has. Perhaps it’s from a slightly warped metal case, because all four feet seem to be present and fairly level. My idea to fix it is to just to take another sticky foot pad thing and put it on the left front foot, which is the side that’s slightly elevated.

The front left foot was the one I needed to boost a bit.
Since I wasn’t satisfied with the pad in the first photo because it was square when the foot itself was round, I did find a perfectly shaped circular pad in a baggie of miscellaneous ones I had.

It’s going to be a bit tough to see, but the PET is probably as stable as it’s going to be now.
With that minor issue resolved, I wanted to power up the PET again just to make sure everything was still functional.

Power on!

The orange glow from the inside of the unit is both good and a bit scary looking.
As you can see, it works! The screen is crisp and gorgeous and every key on the keyboard works, although 2918 bytes free of memory doesn’t sound quite right. It should instead have 7167 bytes free. Hopefully the one upgrade fixes that RAM issue by bypassing it completely.
Before I get to the first upgrade, I just wanted to check if the tape drive worked. Last time I recall, it didn’t read in a tape. If it doesn’t work this time, I’ll wait on replacing that in the future (if I bother at all since I can just use one of a seemingly infinite number of external tape drives I have).

It could also be any other number of issues, including the tape itself.
Unfortunately, no luck. It’s something I’ll have to test again with a different tape in the future, maybe doing a head cleaning and demagnetizing first, but I think the internal tape drive is probably shot.
So, for the first upgrade, I’m going to have to open up my PET.

This is the one that goes inside the unit.
On mine, there are only two screws – one on each side – holding the case down.

I’m sure it was different from the factory, but right now there is only one screw on each side keeping the lid from moving up.
With both screws removed, I lifted the lid up. Yes, it’s as terrifying as it looks.

The lid is up. I have to put that kickstand on the upper left down to keep it stable.
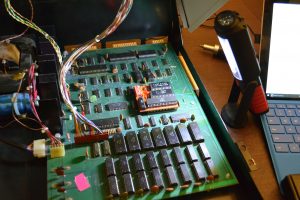
I need to replace the CPU chip with this new board. The dip switch settings on the new board are set to 32K RAM (from a choice that also includes 8K and 16K) and BASIC 4 (from a choice that also includes PET tester, BASIC 1, and BASIC 2), so that’s good for me.
Now I just have to remove the CPU.

For visual reference, I digitally labeled the CPU, The CPU.
That chip was in there good, but I eventually got it out with a standard chip puller. One of the 6502’s pins got bent fairly badly in the extraction, but fortunately, I shouldn’t need it again and can always work on unbending if I ever did.
Now it’s time to insert the new board.

The CPU did come out, but not without a pin casualty.
Another tight fit and a struggle, but it eventually went right in.

There were no notable issues getting the new board in.
Now to close the lid and see what happens when I turn it on.
And… nothing but bars on the screen. It turns out I have to put the CPU in that socket on the new board. Doh! Now to carefully unbend that darn pin!

Before.

After.
Still a little crooked, but hopefully it will go in.
And… the pin snapped off. So, off to eBay to get a replacement 6502 chip!

Dang!
So, there will be an unexpected part two in a little more than a week, then.

The empty CPU socket mocks my ham hands.
Part 2 is now live.

3 Comments
Leave your reply.