In my previous first look and then unboxing of the New Matter MOD-t 3D printer, I noted a few key points. One, was its consumer and beginner friendly design, while still offering flexibility and high quality prints for more experienced users. The other was its amazing aesthetics, which carried right through to the packaging. The big question that remains, however, is how good is this printer in actual use?

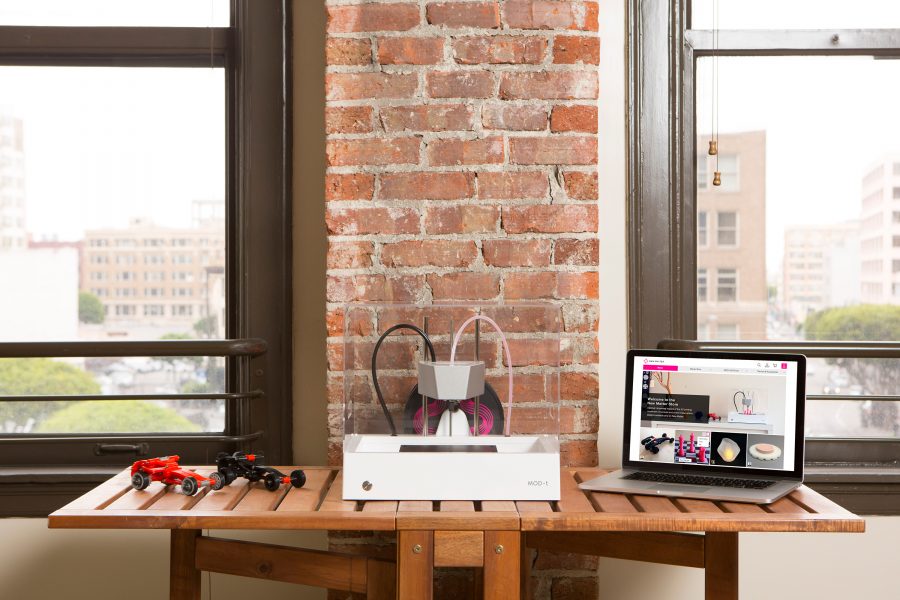
A beauty shot of the printer.

All that you get.
In the box you get the following:
- MOD-t printer (main unit)
- Clear cover (helps reduce noise and enhance safety)
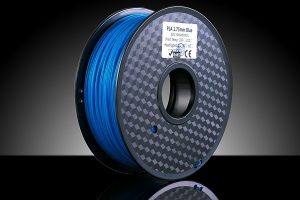
- New Matter 0.5 kg filament spool (a full-sized spool is 1 kg), random color (I received their Arctic Blue Pearl PLA Filament)
- Spool holder
- AC power supply
- Power cord
- Print surface plate (provides a 6x4x5 inch build area)
- Build tray base
- USB cord (this printer works over USB or wireless, although you’ll have to use USB for initial setup)
- Wire brush (to remove filament from the extruder hot end)
- Scraper handle and plastic blade (for help in removing printed models; the print surface plate also flexes to help with this)
- Utility cutter (useful for snipping supports off printed models, although I prefer more precise micro-shears in most cases)
- User manual
Once everything is unpacked, the first order of business is to go to www.newmatter.com/setup and follow the instructions, which includes downloading software. On my first attempt, after following the instructions to plug in the USB cable, the software failed on my Windows 10 desktop. I re-ran the installer and went through the prompts again. Fortunately, the second time it succeeded in uploading the latest firmware to the printer and proceeding with the rest of the setup process.
The other early hiccup I ran into was that the initial setup didn’t see any wifi networks. I continued via USB for the remainder of the setup process.

Placing the assembled build tray.

Attaching the spool holder.

Auto calibration.

Using the wire brush to scrape off extruded filament remnants on the print head.
I decided to do the test print, which is a keychain attachment in the shape of the New Matter logo. For the most part, the end result was a clean print.

Starting to print the keychain.

The finished print was excellent.
The printer was still unable to see any wifi networks, but I was able to manually enter my network details for a successful wireless connection. There still was far less consistency there, though, particularly when accessing the store from a browser. For now, it seems, USB is the best connection option and it’s the one I stuck with for the remainder of this review.
Like the software option, the Web interface lets you select your printer, see the print head temperature, and load and unload filament. There are slight differences between the software option and the Web interface, though. For instance, on the Web interface, you can upload your own STL and OBJ files and add them to your library for printing, as well as stop print jobs. On the software interface, you can upload G-code files and can only stop print jobs from the button on the front of the printer.
The auto calibration feature is one of this printer’s aces in the hole. Many other printers require some type of manual adjustment, but this is all automatic. That’s no doubt helped by the MOD-t’s innovative method of moving the print platform forward and back and left and right, and just letting the actual print head move up and down.

Looking good on my standing desk.
The next test print was a two part Kitteh Key Holder that my oldest daughter wanted. Fortunately, it was free in the New Matter library. For this test, I chose the High Quality option, rather than the balanced or low quality options. Naturally, High Quality prints the slowest.

The keychain and keychain holder printed nicely.

Reverse angle.
My middle daughter wanted a pug printed from Thingiverse. As with all external 3D models that are generic for any printer, it was an STL file instead of the G-code that the MOD-t’s advanced mode accepts. Fortunately, such a conversion is relatively easy. In this case, I used Slic3r on my computer and the configuration file and relevant instructions from here (thanks to user “energywave”).

Bringing the model into Slic3r.

Seeing how the supports will print.
The nice thing about a program like Slic3r is that it evaluates any errors in the model and fixes them for optimized 3D printing. It even takes care of supports for areas of the model that might otherwise collapse when being printed (you snap off or snip these after the model prints).

The model in progress.

In action.

More progress.

Done!
After a little over six hours, the pug finished printing (note that instead of selecting the New Matter filament, I accidentally left one of the BQ filaments selected in my Slic3r settings; presumably that didn’t make a huge difference in the final output). The results speak for themselves.

Removing the supports and model.

Some tools I used in the clean up of the model. There wasn’t much to do overall.

The finished product. Good dog!

Roll over!
Of course, all of this is just the tip of the 3D printing iceberg with this printer. For instance, I didn’t try changing filament midway through for a two (or more) tone print. That’s possible with the start/pause button on the front of the unit. I also need to continue to explore the relative limitations of uploading STL files directly to the Web interface for printing versus using intermediary software like Slic3r and the software interface.
This is an amazing printer for beginners, with incredible output for the price. You’ll no doubt quickly want to move on from the New Matter library to more advanced work (including making your own models!), which proves a bit more challenging with the dearth of settings/configuration files available for the popular slicing software (although their preferred slicing software is Cura, it’s not easy to access a good configuration file for it). That makes this printer something of a tease. However, no 3D printer is perfect, and the areas where this printer excel far outweigh any of its challenges or relative shortcomings.
Pluses:
- High print quality
- Auto calibration
- Great price
- Looks good on a desktop
- Connection over USB or wifi
- Newcomer friendly
Minuses:
- Wifi interface is inconsistent
- Not easy to track down configuration files/settings for popular slicing software
- Relatively limited content library in the New Matter store
- Short AC adapter cord
- No on/off button; if it’s plugged in, it’s on
- Only includes a half roll of filament
Be sure to look for an upcoming article on TechRadar, where I will feature more of this printer’s output.
Thanks to New Matter for the review unit.
UPDATE: Review Follow-up 01


 Your total news and information resource for all things Science, Technology, Engineering / Mathematics, Art, and Medicine / Health.
2 Comments
Leave your reply.