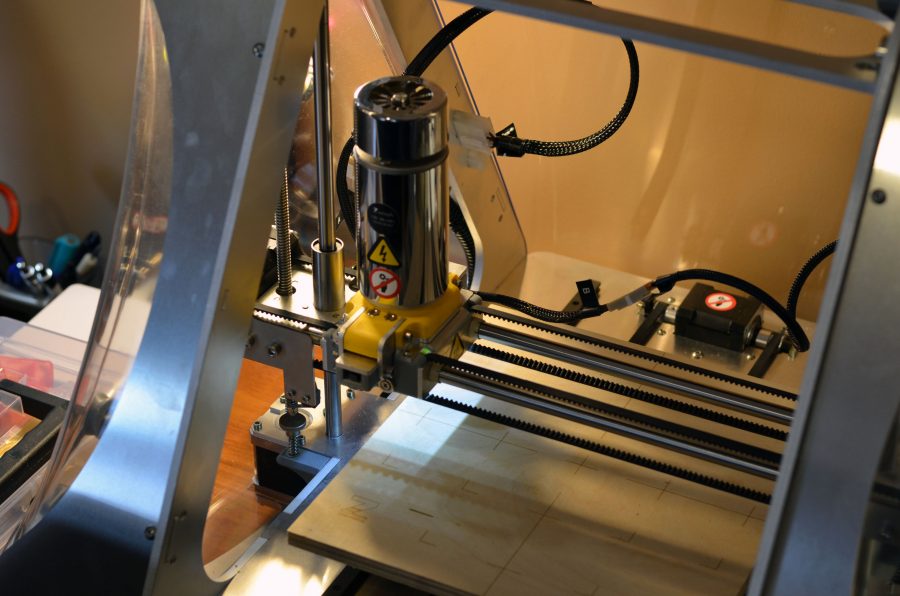
After my prior first look, unboxing, initial setup, extended review of basic 3D printing, and review of the laser toolhead option for the remarkably versatile ZMorph 2.0 SX Full Set, I’m now ready to tackle a review of the CNC PRO milling toolhead add-on. This toolhead allows for engraving, cutting, and milling in 2D and 3D planes and can be used with various types of wood, PCBs, machining wax, plexiglass, leather, and paper, as well as other select materials. This will also be my final review in the series on the ZMorph 2.0 SX, so I’ll wrap up with some concluding statements about the overall machine itself.
I also have the CNC Milling Fun Pack, which includes four additional milling bits and a set of project materials:
- 2 x Carbide bit single flute 1 and 3mm (Pin 3.175mm or 1/8 inch, Bit length: 38mm)
- 1 x Spherical bit double flute (Pin 3.175mm or 1/8 inch, Bit length: 40mm)
- 1 x Engraving bit V-Type PCB (Pin 3.175mm or 1/8 inch, Bit length: 30mm)
- 1 x Cube wooden block (104 x 105 x 45 mm)
- 2 x Rectangular wooden blocks (100 x 200 x 20 mm)
- 2 x Plexiglass (100 x 200 x 4 mm)
- 2 x PCB laminates (100 x 200 x 1.6 mm)
Getting Started
To start, I went through these critical Knowledge Base pages:
- CNC Milling Safety Guidelines
- How to Prepare ZMorph 2.0 SX for CNC Milling
- Material Attachment in 2d CNC Milling
- Using the 3D Milling Toolhead – Example Workflow
After getting my bearings and successfully installing the toolhead (Pro tip: the drill bit is very sharp, so take extra care when handling!), I was ready to go.
The Machine in Action
My testing involved using one of the rectangular wooden blocks and carving “Armchair Arcade” into it. For that, I went to Voxelizer and carefully followed the calibration steps here. Although I had a few false starts, I eventually was able to figure out the right settings. This process went quite a bit smoother than my previous laser engraving tests.

My gcode display in Voxelizer, with the print in progress. Don’t forget to set “Spindle On” before you send the print job!

A quick vacuum and it’s looking good! I used Blu-Tak and some blue painter’s tape instead of double-sided tape to secure the wood to the platform. That worked well.
For my second test, I decided to mill a miniature stool, following the instructions and using the file here. While the cuts were true, I didn’t quite get the depth right:
It really is an extraordinarily neat process. Subtractive manufacturing is quite different from additive manufacturing like 3D printing. It’s pretty amazing that this one machine handles both of those functions and so much more.
Conclusions
I wish I had more time with this unit (I didn’t even get a chance to try the more advanced 3D milling feature, or the thick paste extruder), but with the review period over, it’s time to send it back. Using just a handle of its many features, I’ve been both overwhelmed and delighted by the possibilities this machine offers. Whether it’s 3D printing, laser engraving, CNC milling, or any of its other features, the future of in-home making and manufacturing is well represented by this one machine. If you’re at all interested in semi-pro work, it would be hard to go wrong with the ZMorph 2.0 SX. The full set really is an amazing value, especially in comparison to similarly priced machines that sport far fewer functions.
Here’s a video (and here’s the making of blog post) of what you can accomplish if you have both the skill and the time to work with multiple facets of this amazing machine:
Pluses:
- Works great
- So many possibilities!
- This one machine really can do just about anything (for a price)
Minuses:
- As expected, a high learning curve, but if you’re DIY-minded, it’s a challenge worth accepting


 Your total news and information resource for all things Science, Technology, Engineering / Mathematics, Art, and Medicine / Health.
Leave a Comment